Connect an app
Connect an app
Pick how your app connects, follow the steps, then send a test.
- Webhook linkMost shops, forms, CRMs and support tools
- Your own API keyApps that give you a key or token
- Stripe keyPayments through Stripe
- SlackNotifications in a channel
- Sign in with the appWhen an app offers it
- Your AI assistantRun Email Digit by asking
- Your mailboxReplies into your Inbox
Webhook link
When to use it: the app can send a webhook to a link, which is how most shops, forms, CRMs and support tools connect. You copy one link from Email Digit and paste it in the app.




















Only owners and admins can connect apps. Everyone else in the workspace sees the status.
On the Email Digit side
- 1Open Agents / Apps and choose the app.
- 2Copy the link.
- 3Paste it in the app’s webhook settings and save.
- 4Send a test. It shows under Recent events.
The link starts with https://api.emaildigit.com/ and is different for every app and every workspace. Only owners and admins can see it. Treat it like a password: if it ever leaks, choose Make a new link. The old one stops working at once.
What the other app needs
Each app has its own webhook settings. Its page lists the exact steps; this is Typeform, word for word from Agents / Apps.
- 1In Typeform, open your form and go to Connect, then Webhooks.
- 2Choose Add a webhook, paste the link below and save.
- 3Turn the webhook on, then choose View deliveries and Send test request to check it arrives.
Email permission for new contacts. Choose These people agreed to marketing email for a newsletter or sign up form where people asked to hear from you. Choose Don’t add email permission when you’re not sure: new contacts get transactional email only until they opt in.
What you see when it works
If it doesn’t work
| Problem | Why | Fix |
|---|---|---|
| Nothing shows under Recent events | The link wasn’t saved in the app, part of it is missing, or the app’s webhook is off. | Copy the link again, paste all of it, save, turn the webhook on and send a test. |
| An event shows Skipped | No email or phone in this event, so no contact was created. | In the app, include the email field in what the webhook sends, then send a test. |
| An event shows Already received | The app sent the same event again. | Nothing to do. The contact was not added twice. |
Disconnect: choose Disconnect in the app’s drawer. The link stops working, so new events are no longer received. Contacts already added stay.
Your own API key
When to use it: the app gives you a key or token instead of webhook settings. You paste the key once and we add the webhook for you.




On the Email Digit side
- 1Open Agents / Apps and choose the app.
- 2Paste the key, and any other field the app asks for, then connect.
- 3We check the key and add the webhook to your account.
- 4Make a test booking or order in the app. It shows under Recent events.
Where to find the key
| App | Where the key is | What it needs |
|---|---|---|
| BigCommerce | In BigCommerce, go to Settings, then Store-level API accounts, and create an API account. | Give it read access to Orders and Customers, and modify access to Information and settings (for webhooks). Paste the store hash (the letters after /stores/ in the API path) and the access token below. |
| Calendly | In Calendly, go to Integrations and apps, then API and webhooks, and generate a personal access token. | Paste the token below. Webhooks need a paid Calendly plan (Standard or above). |
| Acuity Scheduling | In Acuity Scheduling, go to Integrations, then API, and copy your User ID and API key. | Paste both below. The Acuity API needs the Powerhouse plan. |
| Eventbrite | In Eventbrite, go to Account settings, then Developer links, then API keys, and copy your private token. | Paste it below. |
We add the webhook for you. Email Digit adds a webhook to your account in the app and removes it when you disconnect.
If it doesn’t work
| Problem | Why | Fix |
|---|---|---|
| “Fill in every field from your account” | A field the app needs is empty, such as the store hash or the User ID. | Copy each value from the place in the table above. |
| “We couldn’t reach the app” | The app didn’t answer. | Try again in a moment. |
| The app refuses the key | The key is wrong, expired, or your plan doesn’t include the API. | Make a new key, and check the plan in the table above. |
Disconnect: choose Disconnect in the app’s drawer. We remove the webhook from your account and nothing more arrives.
Stripe key
When to use it: your shop takes payments through Stripe. A restricted key lets us read your customers and payments and set up the webhook. It cannot move money.

Steps
- 1Open Agents / Apps and choose Stripe.
- 2Create a restricted key in Stripe, with the permissions below.
- 3Paste the key in Email Digit and connect.
- 4Make a test payment. The customer arrives as a contact and the payment as revenue.
| Stripe permission | Level |
|---|---|
| Customers | Read |
| Checkout Sessions | Read |
| Payment Intents | Read |
| Invoices | Read |
| Subscriptions | Read |
| Products | Read |
| Prices | Read |
| Charges and refunds | Read |
| Webhook Endpoints | Write |
Test mode and live mode
A key that starts rk_test_ connects your Stripe test mode, so you can try it with test payments. When you’re ready, connect a live key, which starts rk_live_.
If Stripe stops accepting the key (it was rolled or deleted), you see: “Stripe stopped accepting our key. Reconnect with a new restricted key.” Create a new restricted key and paste it.
Disconnect: choose Disconnect in the Stripe drawer, then delete the restricted key in Stripe if you no longer need it.
Slack
Your workspace notifications post to the channel you choose, the same ones that reach your notification feed

- 1Open Agents / Apps and choose Slack. The next two steps are the ones shown there.
- 2In Slack, create an incoming webhook for the channel you want (Slack apps, then Incoming Webhooks).
- 3Copy the webhook URL Slack gives you (it starts with https://hooks.slack.com/services/) and paste it below.
- 4Choose Send a test message. You see “Test message sent to Slack.” and the message in the channel.
If Slack says “Paste the Slack incoming webhook URL.” the link you pasted is not one; it must start with https://hooks.slack.com/services/. If it says “Slack didn’t accept that link.” check you copied all of it, then try again.
Disconnect: notifications stop posting to Slack. Nothing else changes.
Sign in with the app
Some apps will let you connect by signing in to them and approving Email Digit, with no link or key to copy. When an app offers it, its drawer in Agents / Apps shows a sign in button, and this section lists the app.
- 1Open Agents / Apps and choose the app.
- 2Choose the sign in button and approve Email Digit in the app.
- 3You come back to Email Digit, connected. New events show under Recent events.
Disconnect: choose Disconnect in the app’s drawer. You can also remove Email Digit from the app’s own list of connected apps.
Your AI assistant
Connect the assistant you already use, and run Email Digit by asking it: contacts, campaigns, automations and reports.



Your assistant reads your contacts, campaigns and reports when you ask. Drafts and changes you approve are made in your workspace, and sending always waits for your explicit yes. The full setup for each assistant, with the server link, is in AI assistants (MCP).
Your mailbox
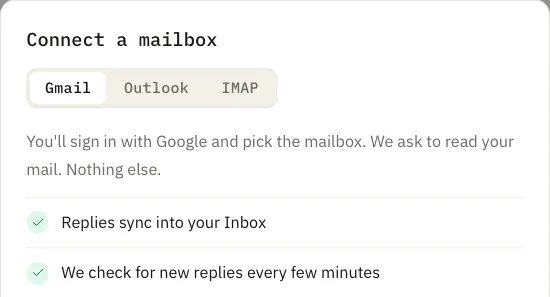
Connect the mailbox your customers reply to, so replies sync into your Inbox. Gmail signs in with Google; any other mailbox connects by IMAP.

Gmail
- 1Open Mailboxes and choose Connect a mailbox.
- 2Choose Google. You’ll sign in with Google and pick the mailbox. We ask to read your mail. Nothing else.
- 3Back in Email Digit, the mailbox shows as connected. We check for new replies every few minutes.
Any other mailbox (IMAP)
- 1Open Mailboxes, choose Connect a mailbox, then Use IMAP instead.
- 2Under Quick-fill from preset, choose your provider. It fills the IMAP host and port.
- 3Enter your Email / username and Password / app password, keep Use SSL/TLS on, and connect.
| Preset | IMAP host | Port |
|---|---|---|
| Yahoo | imap.mail.yahoo.com | 993 |
| iCloud | imap.mail.me.com | 993 |
| Zoho | imap.zoho.com | 993 |
| Fastmail | imap.fastmail.com | 993 |
| AOL | imap.aol.com | 993 |
| GMX | imap.gmx.com | 993 |
| Yandex | imap.yandex.com | 993 |
Use an app password. When two-step sign in is on, most providers refuse your normal password here. Create an app password in your provider’s security settings and paste that instead.
Disconnect: remove the mailbox in Mailboxes, and its replies stop syncing.