Build email automations that convert, step by step
An email automation converts when four things are true: it starts at a moment that means something, each email asks for one thing, it stops as soon as the person does what you wanted, and you have received it yourself before anyone else does. The nine steps below build one in Email Digit in that order, and the order carries over to any tool.
Step 1: Name the goal before you draw anything
Write one sentence that says what a successful contact does: buys, replies, books a call. That sentence becomes the flow’s goal, and it is the reason the flow ever stops. Choose something a person has to decide to do. Opens are the wrong goal, because mail apps that preload images record opens nobody made, and an open goal can end a flow for someone who never read it.
If the goal is a purchase, Email Digit can only see it when your shop reports the order. Plan to send one request per order through the conversions API, or a flow with a purchase goal will run to the end for everyone. The goals guide covers this in full.
Step 2: Pick the moment it starts
A flow can start manually, when a contact joins a segment, gets a tag, replies, reaches a date on their record, or when your app reports an event. Ask what the moment is. If the timing matters to the minute, such as a welcome after signup, use an event. If the flow is about a condition that lasts, such as being a lapsed customer, use a segment. Six ways an email automation can start compares all six.
Step 3: Decide who enters
For segment, tag and date triggers you choose who enters when you switch the flow on. The default is only new contacts, so a new flow does not email your whole list on day one. Choose everyone who matches now, and later, only when you mean it, such as a win-back aimed at people who are already quiet. The confirmation shows the segment’s current size first. Either way, a contact enters a given flow once.
Step 4: Draft the emails, then edit them
You have three ways to begin:
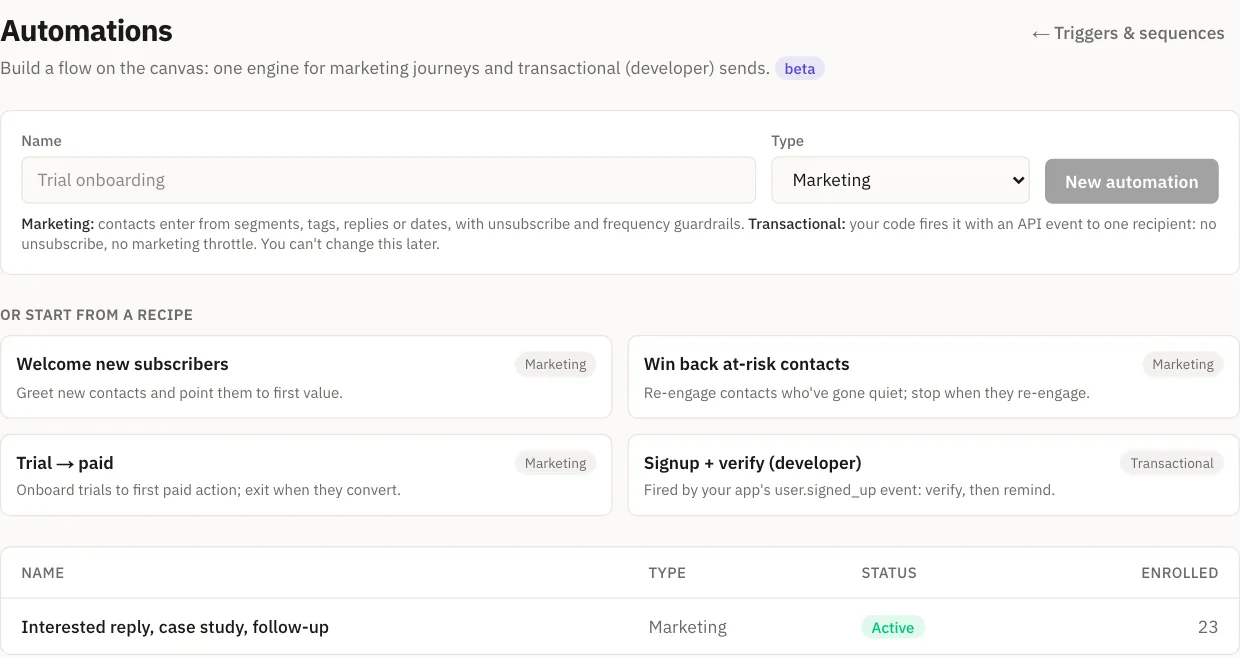
- A recipe. Four starters ship in the product: welcome new subscribers, win back contacts who have gone quiet, trial to paid, and a signup and verify flow for developers.
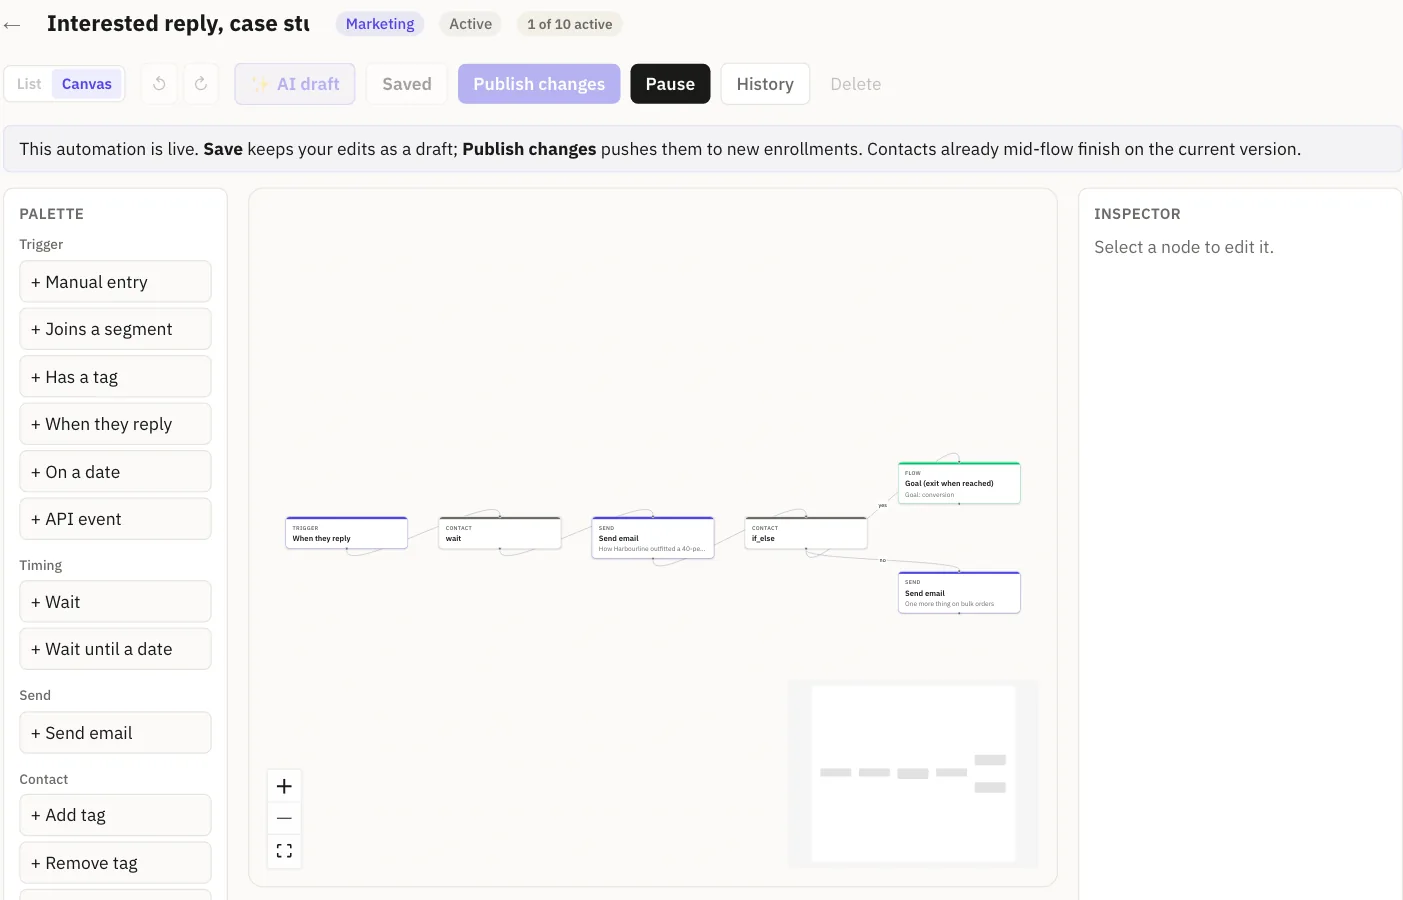
- AI draft. On the canvas, press AI draft and describe the flow in plain words. It writes the steps using your active brand and lays them on the canvas.
- Blank. Drag steps from the palette and connect them.
Three things to know about AI draft. It replaces the draft on the canvas, so use it before you hand edit, or press Undo in the message that appears. It uses AI actions from your plan, and says so if the allowance is gone. And if AI is not available, you get a starter template instead, and the editor tells you that is what it is. Treat any draft as a first pass.
Then edit for conversion. Give each email one job and one link. Write the subject for the person reading a list of subjects, not for the person who built the flow. Fewer, clearer emails usually beat a long sequence, and you can add a step later.
Step 5: Set the waits
A Wait step holds a contact for a set time. Wait until a date holds them until a date on their record, plus or minus some days, which suits renewals and trial ends. Your protections run on every send as well: a contact on your do-not-send list is skipped, a send that would break your weekly limit is retried 12 hours later, and quiet hours, if you turned them on, push a send back an hour at a time. These are UTC hours, not each recipient’s local time.
Step 6: Add the goal and one branch
Put the goal step in the flow so it is checked before every send, not only at the end. Someone who buys during a three day wait then leaves at the next step, and the reminder after the wait never goes. For one email that only some people should get, give the send an only run if condition, such as only if they have not converted.
If you need a real split, add a branch. A branch needs at least two paths and at most one Otherwise path, and the flow will not publish otherwise. When nothing matches and there is no Otherwise path, the contact finishes the flow there rather than being forced down a path they do not fit.
Step 7: Test drive it as a recipient
Activate the flow, then type an address you own into Test drive. The first step runs at once, and waits take their full time, so you see the flow as a recipient does. A test address has no history, so it skips only run if steps, takes the Otherwise path of a branch, and never meets the goal. To test those, run a real contact who matches through the flow’s own trigger. The test drive guide has a checklist for the first run.
Step 8: Publish, then read the run log
Every step a contact passes is written to the run log as done, held, skipped or failed, and a held send says why. Read it after the first real contacts go through, not only when something looks wrong. Editing a live flow does not move people already in it. They finish the version they started, and new contacts get the new one.
Step 9: Judge it on replies and revenue
Email Digit shows opens and never scores them. Judge a flow by whether people answered and whether they bought. Replies appear in the inbox, read and ranked. Revenue comes from the orders you report: each is credited to the last email the buyer clicked in the 30 days before the order, or failing that the last email sent to them in that window, and appears on the Engagement page. Two honest limits: a flow with no orders reported cannot show revenue, and last touch credits email even for a buyer who would have bought anyway, so read it as an upper bound.
That is the loop: a goal you can name, a moment that starts it, a draft you edit, a test you run, a log you read, and numbers that cannot be inflated by a mail app. To build one on your own list, start free for 15 days and open Automations.